
Cacti là công cụ giám sát mã nguồn mở giúp quản trị viên theo dõi các tài nguyên như CPU load, mức sử dụng RAM, lưu lượng mạng, trạng thái của tất cả các thiết bị kết nối mạng từ đó giúp quản trị viên đưa ra cảnh báo, phát hiện hoạt động bất thường hoặc nghi ngờ của hệ thống. Bài viết dưới đây Viettelco sẽ hướng dẫn bạn cài đặt Cacti trên centos 8.
Để cài đặt Cacti trên Centos 8, bạn cần thực hiện các bước sau:
Bước 1: Cài đặt và bắt đầu Apache httpd, PHP, Mariatham khảo tại đây.
Sau khi đã cài đặt xong LAMP xong thì chúng ta bắt đầu đi cài đặt Cacti.
Bước 2: Cài đặt Cacti và SNMP
# cài đặt từ EPEL
[root @ viettelco] # dnf –enablerepo = epel -y cài đặt cacti net-snmp net-snmp-utils php-mysqlnd php-snmp php-bcmath rrdtool
- Cấu hình SNMP (Giao thức quản lý mạng đơn giản).
[root@viettelco ~]#
vi /etc/snmp/snmpd.conf
# line 41: comment out
#com2sec notConfigUser default public
# line 74,75: uncomment and change
# change [mynetwork] to your own network
# change comunity name except public, private (for security reason)
## sec.name source community
com2sec local localhost
com2sec mynetwork 10.0.0.0/24
# line 78,79: uncomment and change
## group.name sec.model sec.name
group MyRWGroup v2c local
group MyROGroup v2c mynetwork
# line 85: uncomment
## incl/excl subtree mask
view all included .1 80
# line 93,94: uncomment and change
## context sec.model sec.level prefix read write notif
access MyROGroup “” v2c noauth exact all none none
access MyRWGroup “” v2c noauth exact all all all
[root@viettelco ~]#
systemctl enable –now snmpd
# verify settings
# replace [Serverworld] to the comunity name you set
[root@viettelco ~]#
snmpwalk -v2c -c Serverworld localhost system
SNMPv2-MIB::sysDescr.0 = STRING: Linux viettelco.srv.world 4.18.0-147.5.1.el8_1.x86_64 #1 SMP Wed Feb 5 02:00:39 UTC 2020 x86_64
SNMPv2-MIB::sysObjectID.0 = OID: NET-SNMP-MIB::netSnmpAgentOIDs.10
DISMAN-EVENT-MIB::sysUpTimeInstance = Timeticks: (583) 0:00:05.83
SNMPv2-MIB::sysContact.0 = STRING: Root <root@localhost> (configure /etc/snmp/snmp.local.conf)
SNMPv2-MIB::sysName.0 = STRING: viettelco.srv.world
…..
…..
- Thay đổi cài đặt MariaDB thành cài đặt Cacti cần thiết hoặc được đề xuất
[root@viettelco ~]#
vi /etc/my.cnf.d/mariadb-server.cnf
# add into [mysqld] section
[mysqld]
…..
…..
default-time-zone=’Asia/Tokyo’
character-set-server=utf8mb4
character_set_client=utf8mb4
collation-server=utf8mb4_unicode_ci
max_heap_table_size=128M
tmp_table_size=128M
join_buffer_size=256M
innodb_file_format=Barracuda
innodb_large_prefix=1
innodb_buffer_pool_size=2048M
innodb_flush_log_at_timeout=3
innodb_read_io_threads=32
innodb_write_io_threads=16
innodb_buffer_pool_instances=17
innodb_io_capacity=5000
innodb_io_capacity_max=10000
# appky timezone setting
[root@viettelco ~]#
mysql_tzinfo_to_sql /usr/share/zoneinfo | mysql -u root -p mysql
Enter password:
Warning: Unable to load ‘/usr/share/zoneinfo/leapseconds’ as time zone. Skipping it.
Warning: Unable to load ‘/usr/share/zoneinfo/tzdata.zi’ as time zone. Skipping it.
[root@viettelco ~]#
systemctl restart mariadb
- Tạo cơ sở dữ liệu cho Cacti và nhập bảng
[root@viettelco ~]#
mysql -u root -p
Enter password:
Welcome to the MariaDB monitor. Commands end with ; or \g.
Your MariaDB connection id is 16
Server version: 10.3.17-MariaDB MariaDB Server
Copyright (c) 2000, 2018, Oracle, MariaDB Corporation Ab and others.
Type ‘help;’ or ‘\h’ for help. Type ‘\c’ to clear the current input statement.
# create [Cacti] database (replace [password] to any password)
MariaDB [(none)]> create database cacti;
Query OK, 1 row affected (0.00 sec)
MariaDB [(none)]> grant all privileges on cacti.* to cacti@’localhost’ identified by ‘password’;
Query OK, 0 rows affected (0.00 sec)
# add [select] right to [time_zone_name] table in [mysql] DB for Cacti requirements
MariaDB [(none)]> grant select on mysql.time_zone_name to cacti@’localhost’;
MariaDB [(none)]> flush privileges;
Query OK, 0 rows affected (0.00 sec)
MariaDB [(none)]> exit
Bye
[root@viettelco ~]#
mysql -u cacti -p cacti < /usr/share/doc/cacti/cacti.sql
Enter password:
# cacti user password
- Nếu SELinux được bật, cần thay đổi chính sách
[root@viettelco ~]#
setsebool -P httpd_can_network_connect on
[root@viettelco ~]#
setsebool -P httpd_unified on
[root@viettelco ~]#
setsebool -P domain_can_mmap_files on
[root@viettelco ~]#
vi cacti-phpfpm.te
# create new
module cacti-phpfpm 1.0;
require {
type admin_home_t;
type httpd_t;
type httpd_log_t;
class file { getattr map open read unlink write };
class dir { remove_name };
}
#============= httpd_t ==============
allow httpd_t admin_home_t:file map;
allow httpd_t admin_home_t:file { getattr open read };
allow httpd_t httpd_log_t:dir remove_name;
allow httpd_t httpd_log_t:file { unlink write };
[root@viettelco ~]#
checkmodule -m -M -o cacti-phpfpm.mod cacti-phpfpm.te
checkmodule: loading policy configuration from cacti-phpfpm.te
checkmodule: policy configuration loaded
checkmodule: writing binary representation (version 19) to cacti-phpfpm.mod
[root@viettelco ~]#
semodule_package –outfile cacti-phpfpm.pp –module cacti-phpfpm.mod
[root@viettelco ~]#
semodule -i cacti-phpfpm.pp
- Cấu hình Cacti và các cài đặt khác.
[root@viettelco ~]#
vi /etc/cron.d/cacti
# uncomment
*/5 * * * * apache /usr/bin/php /usr/share/cacti/poller.php > /dev/null 2>&1
[root@viettelco ~]#
vi /usr/share/cacti/include/config.php
# line 29: change to the connection info to MariaDB$database_type = “mysql”;
$database_default = “cacti”;
$database_hostname = “localhost”;
$database_username = “
cacti
“;
$database_password = “
password
“;
$database_port = “3306”;
$database_ssl = false;
[root@viettelco ~]#
vi /etc/php.ini
# line 383: change to Cacti recommended
max_execution_time = 60
# line 404: change to Cacti recommended
memory_limit = 512M
# line 902: set default timezone (replace to your own one)
date.timezone = Asia/Ho_Chi_Minh
[root@viettelco ~]#
vi /etc/httpd/conf.d/cacti.conf
# line 17: add access permission if you need
Require host localhost
Require ip 10.0.0.0/24
[root@viettelco ~]#
systemctl restart httpd php-fpm
Sau khi đã hoàn thành cài đặt theo các bước ở trên ta tiến hành thiết lập ban đầu cho Cacti.
Truy cập vào http://ipddress/cacti/ từ bất kỳ trình duyệt web nào bạn có, sau đó biểu mẫu đăng nhập Cacti được hiển thị. Đăng nhập với tài khoản và mật khẩu là: admin / admin.

Sau khi đăng nhập ban đầu, thay đổi mật khẩu là bắt buộc, thay đổi thành bất kỳ.

Chọn hộp [Accept GPL License Agreement] và nhấp vào nút [Begin].

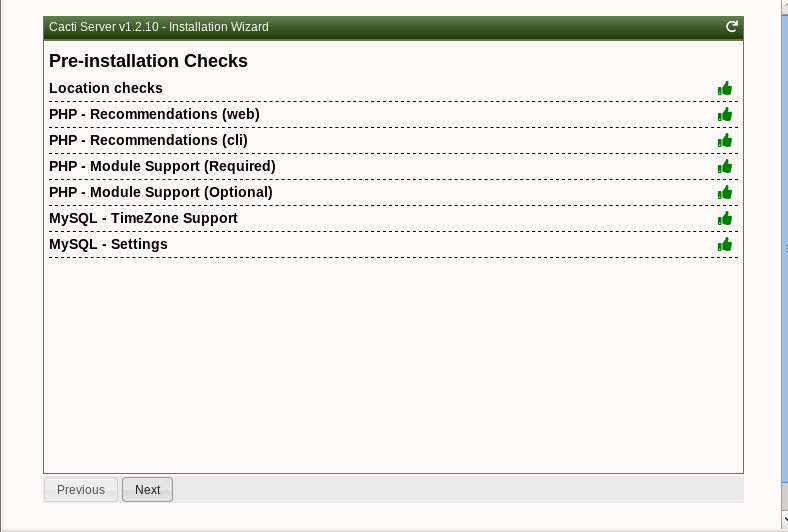
Kiểm tra trước khi chạy cài đặt. Nếu tất cả đều ổn, biểu tượng có màu xanh nhưng nếu không ổn, biểu tượng chuyển sang màu đỏ.
Đối với thiết lập ban đầu, chọn [New Primary Server]

Kiểm tra quyền thư mục. Nếu tất cả đều ổn, biểu tượng có màu xanh nếu chưa được, biểu tượng có màu đỏ.

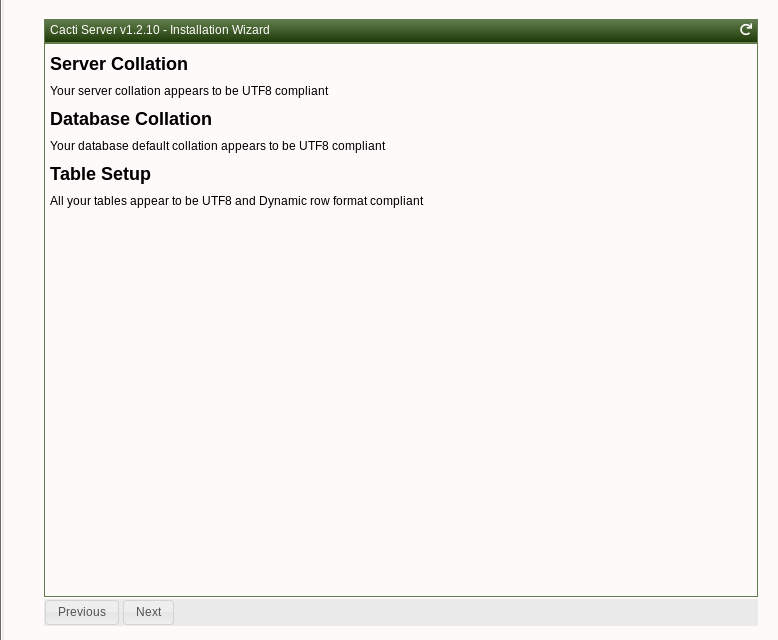
Mỗi đường dẫn ứng dụng và phiên bản cần kiểm tra. Nếu tất cả đều ổn, biểu tượng có màu xanh, nếu chưa được, biểu tượng có màu đỏ.

Đọc phần này và đánh dấu vào ô [I have read this statement], sau đó tiếp tục cài đặt.

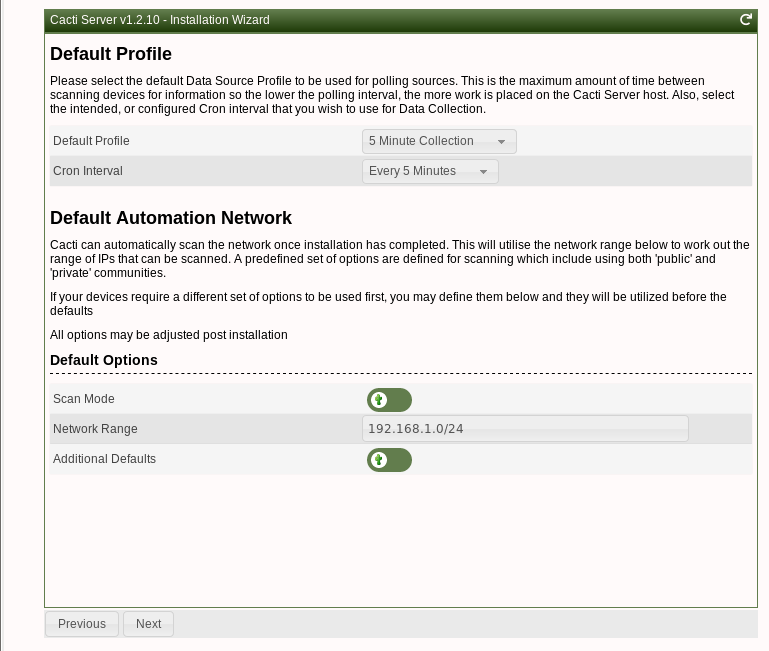
Chọn hồ sơ mặc định cho mỗi cài đặt
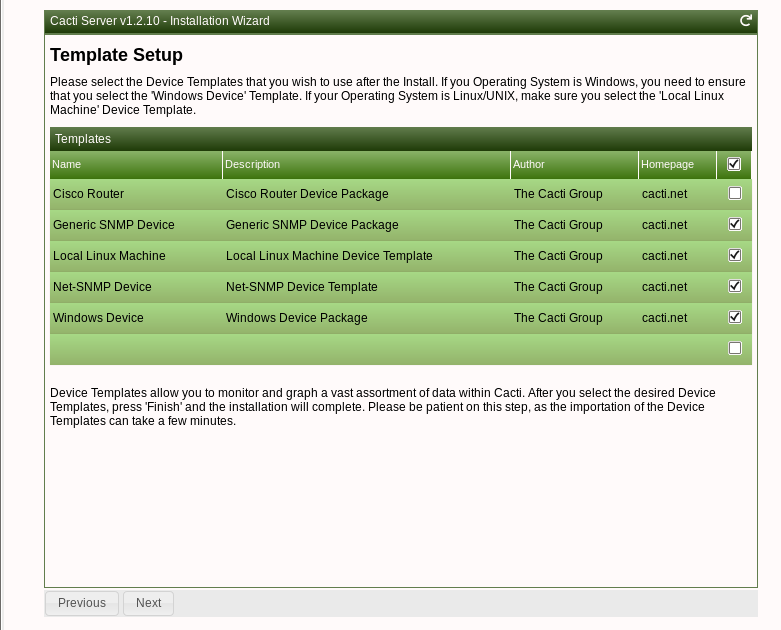
Đây là phần thiết lập Mẫu. Kiểm tra hộp mẫu bạn muốn kích hoạt.
Tiến hành tiếp theo
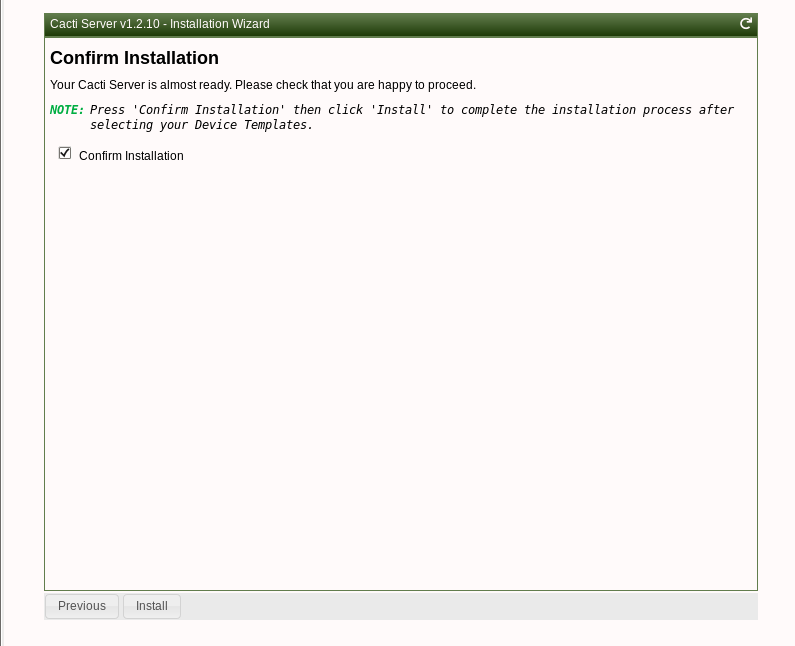
Chọn một hộp [Confirm Installation] và nhấp vào nút [Install].
Sau khi cài đặt thành công, nhấp vào nút [Get Started] để sử dụng Cacti.

Đây là bảng điều khiển quản trị Cacti.

Như vậy là Viettelco đã hướng dẫn chi tiết các bước cài đặt Cacti trên CentOs 8, nếu có bắt kì thắc mắc hay cần hỗ trợ bạn có thể hệ với ký thuật của Viettelco đã được hỗ trợ.